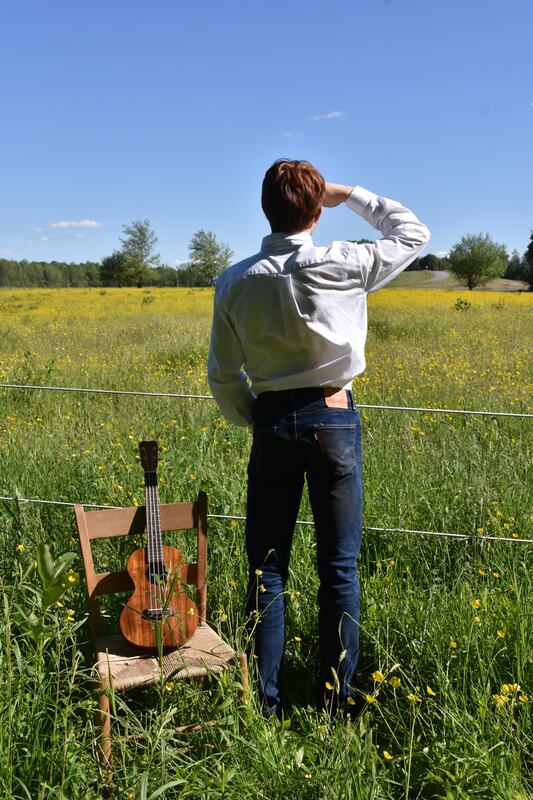
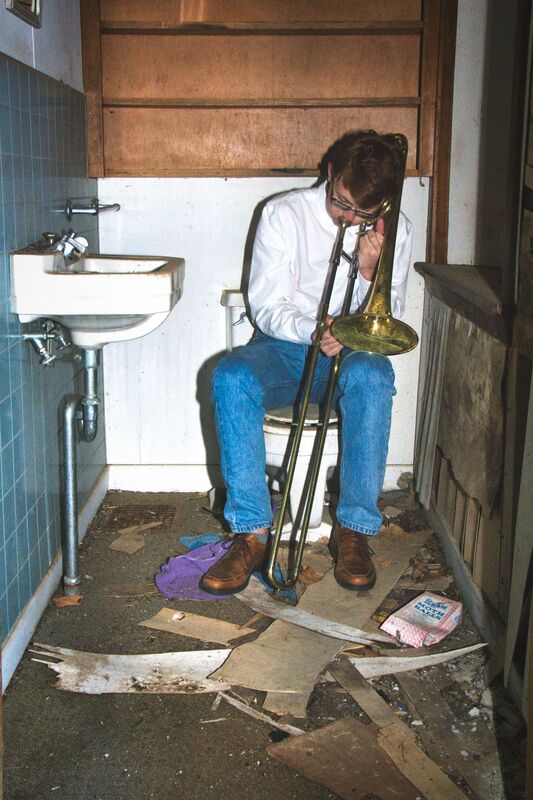
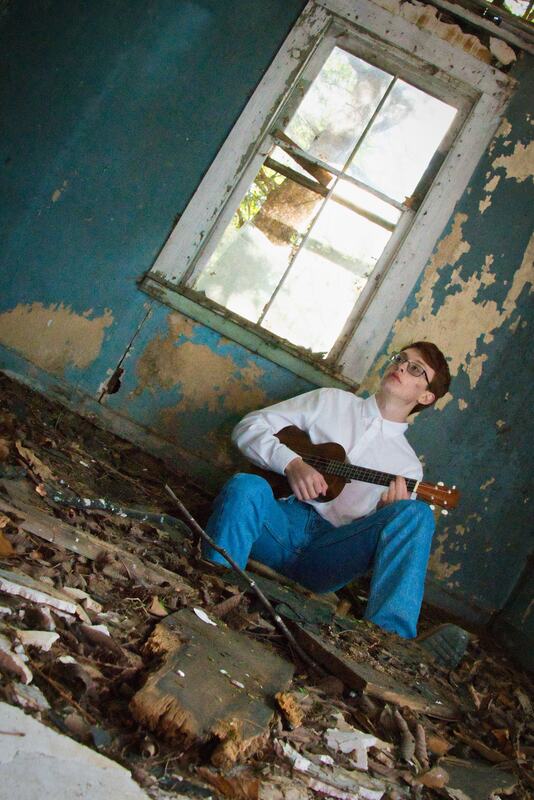
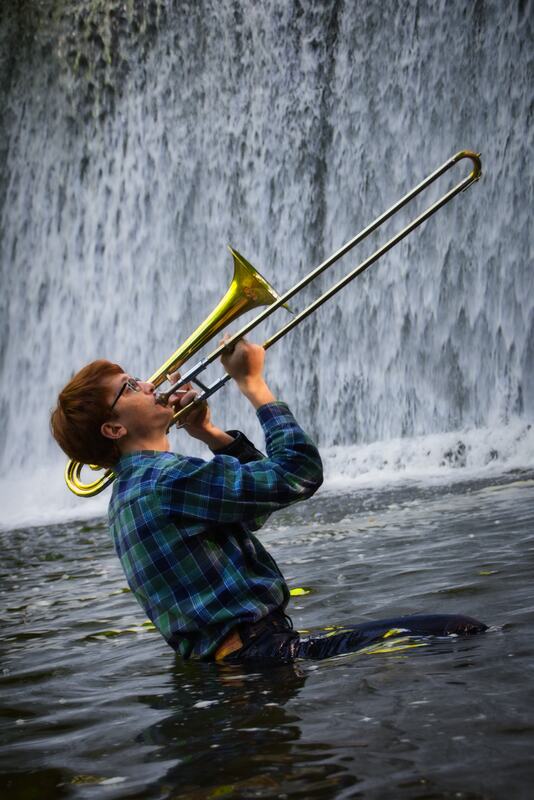
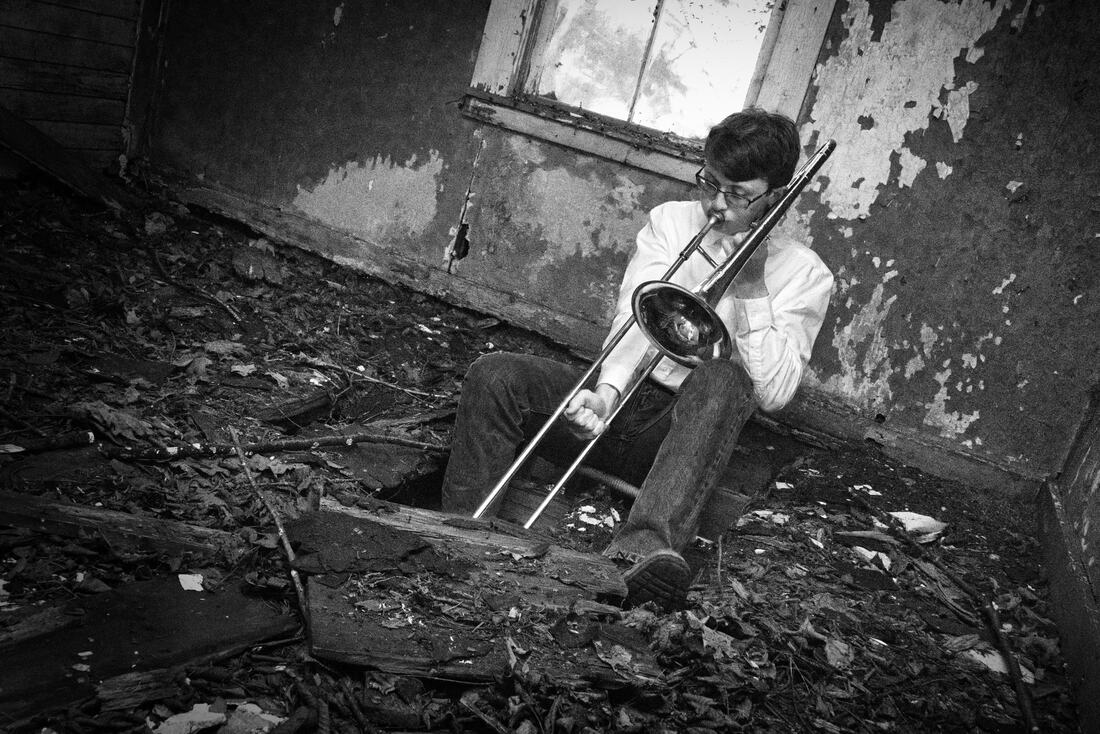
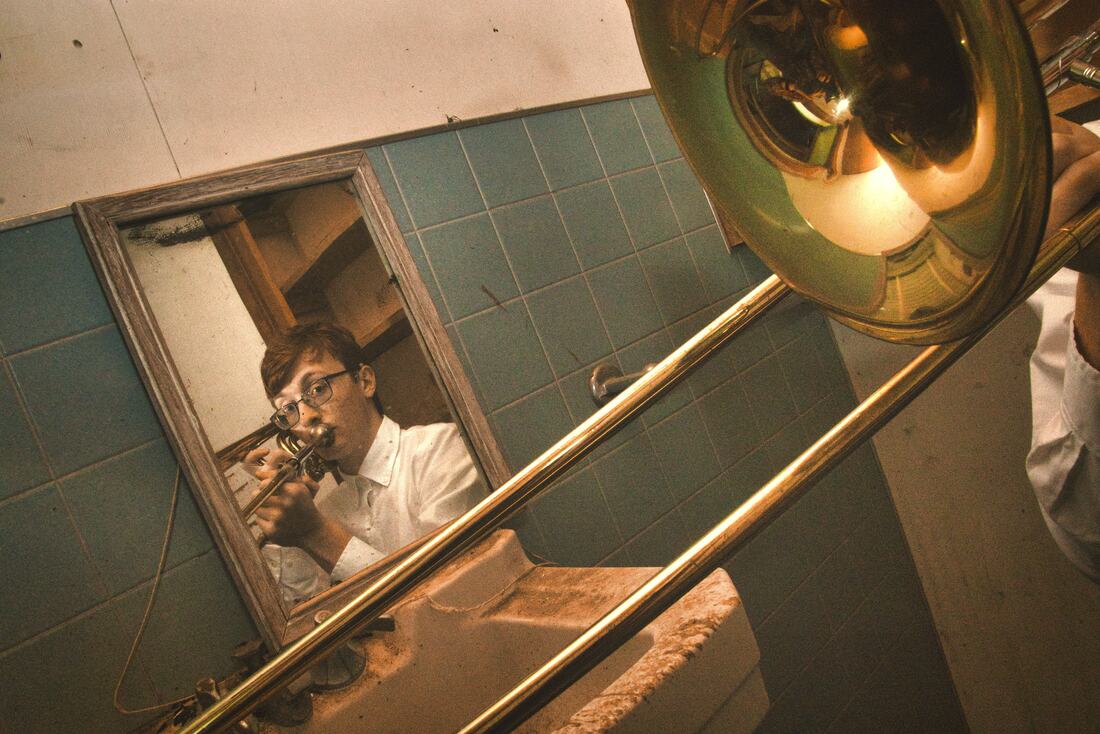
PreparationRecently while I was looking through the portfolios of French street photographer Robert Doisneau and his photo series with actor and cellist Maurice Baquet. I loved how Doisneau would use unconventional locations to highlight his subject and their instrument. This portfolio inspired me to give this style a shot, so I called a musician friend and set up a shoot. I dug my father's old trombone out of the basement and prepared for the day of the shoot. Part 1: The Pasture and Waterfall My first stop with my subject was a horse pasture that was blanketed with yellow mustard weeds. I got some rather interesting compositions but had some problems with the harsh lighting from the sun. For this reason my best images from this area were with my subject, with his ukulele beside him, looking pensively across the pasture. Our next stop took us into the woods to a waterfall. My musician friend had previously looked at the Doisneau portfolio I was inspired by and suggested that he go for a little dip in the freezing water in order to get what we thought was "The Shot". After the party that was hiking the trail before us left, we broke out the trombone and got after it. Part 2: Abandoned BuildingsOur next locations were two abandoned houses that I have found make for some lovely images. In one of them the bathroom is the only area not stripped bare so I set about getting pictures of my subject and his trombone, atop the porcelain throne. I then moved a mirror to attempt to add another point of interest to the photo. We then moved to a defunct labor camp that was in even worse shape. My friend put a chair in a hole in the floor and began to strum on his uke while my shutter clicked away. ConclusionsFor my first themed shoot I'm pretty happy with my results. Besides I had a ton of fun over the 5 hours of the shoot. If I were to do it again I would have shot more images on digital instead of film. In addition to the 800 photos on digital I also shot 72 frames of TMAX 400 during the shoot.
I hope you enjoyed! -HV
0 Comments
EquipmentAll of my star trail photos were taken with my Nikon d7200 and Nikon 10-20mm DX lens. It is best to have a cable shutter release in order to prevent camera shake as well as its ability to hold the shutter open. For my first star trail shoot I didn't yet own a cable release and duct taped a small pebble over the shutter release. It worked well enough for that first shoot, but I advise using a cable release. After the photos are taken you can use the free Starstax software to stack them and create the trails. 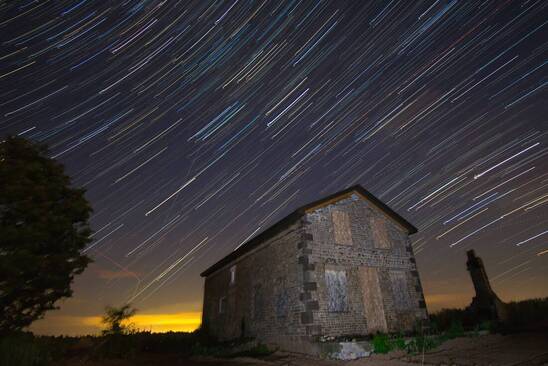 My first attempt at star trails. Making the PhotoFirst of all a little disclaimer, this is merely how I get the shot my techniques are merely suggestions and I recommend experimentation. I start before the sun goes down, scouting locations that I feel will provide an interesting composition once the night begins. I like to keep my foreground subject for the most part in the bottom third of the frame. From here I focus the lens on the brightest star using manual focus and the live view screen to provide crisp stars. From here on out I use 30 second exposures continuously firing with the widest possible aperture and the ISO being dependent on the ambient light of the night wit ISO 800 being my starting point. Prior to starting the series I take a series of test shots to see whether or not I like the exposure and warmth of the image. From here on out I turn the motor drive on and settle in for wait that should be 45 minutes at minimum. 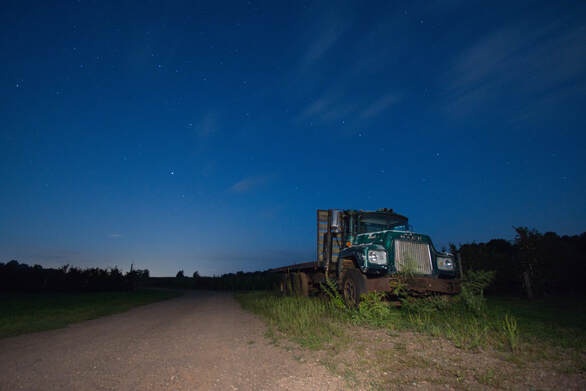 An example of a test shot 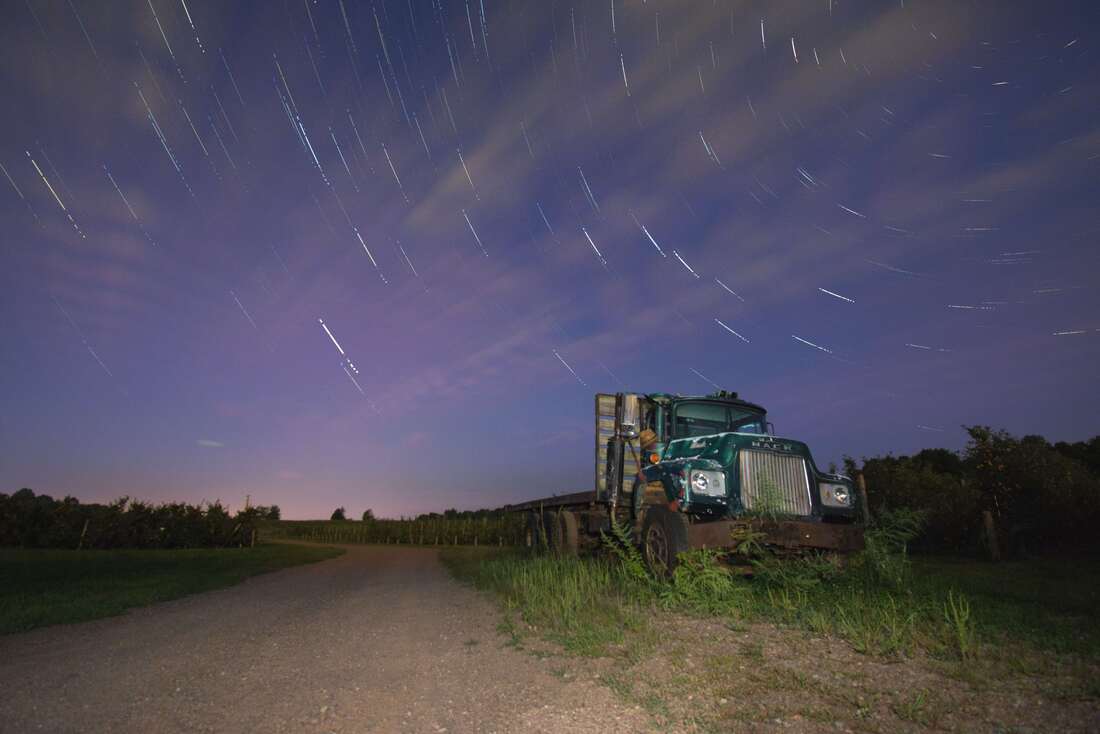 The finished product Finishing the JobOnce all the photos are taken I upload them to Starstax. If you shoot RAW you will need to first convert to JPEG, hence I recommend shooting JPEG from the start. Now you need to set Starstax to fill the gaps between the frames and wait while the finished product is compiled. After this you can take it to your preferred editing software and adjust anything you feel is needed. Hope that was helpful! -H.C. VanDeWalle
|
 RSS Feed
